![]()
🤖 Robo Semantic Segmentation 🤖
A REALLY! simple to use library for semantic segmentation, even a untrained network can use it.(not really)
Customized implementation of the U-Net in PyTorch for high definition images with a simple API to use. It’s really easy in just 3 lines of code you can a highly accurate working model.
Data Preprocessing
Dataset
└── Images
    └── 01.png, 02.png, 03.png
└── Masks
    └── 01.png, 02.png, 03.png
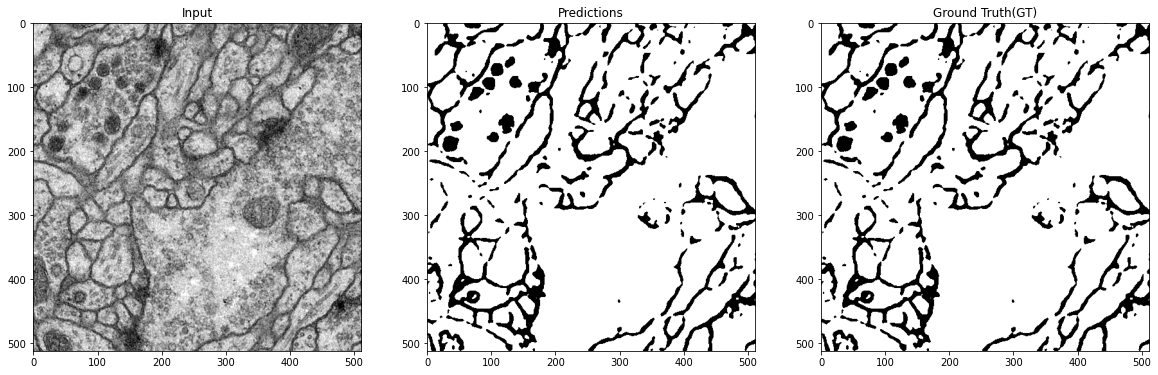
You’ll need two directories Images and Masks, in the Images directory you’ll have all the input images to the model and in the Masks directory you’ll have all the corresponding annotation masks; each pixel in the annotation map corresponds to the class label i.e., if a pixel in the annotation map is 1 then it’s class is also 1 and so on.
And make sure the file names correspond with each image and annotation pair as shown in the tree.
Usage
Note : Use Python 3.6 or newer
Python Wrapper(Recommended)
import pytorch_segmentation as ps
net = ps.make_model(n_channels=3,n_classes=1,bilinear=True,dir_img = '/content/data/data/membrane/train/image/',dir_mask = '/content/data/data/membrane/train/label/') # n_channels is the number of input channels(i.e,3 for rgb,bgr,etc.. and 1 is for grayscale images)
ps.train(net=net,epochs=5,batch_size=4,lr=0.0001,img_scale=0.5,val_percent=10.0) # train the network
By default, the scale is 0.5, so if you wish to obtain better results (but use more memory), set it to 1.
Prediction
After training your model and saving it to a *.pth, you can easily test the output masks on your images via the CLI.
To predict a single image and save it:
python predict.py -i image.jpg --model model.pth
It’ll be saved to a file called output.png
To predict a multiple images and show them without saving them:
python predict.py -i image1.jpg image2.jpg --viz --no-save
You can specify which model file to use with --model MODEL.pth.
Training via the CLI (Deprecated)
> python train.py -h